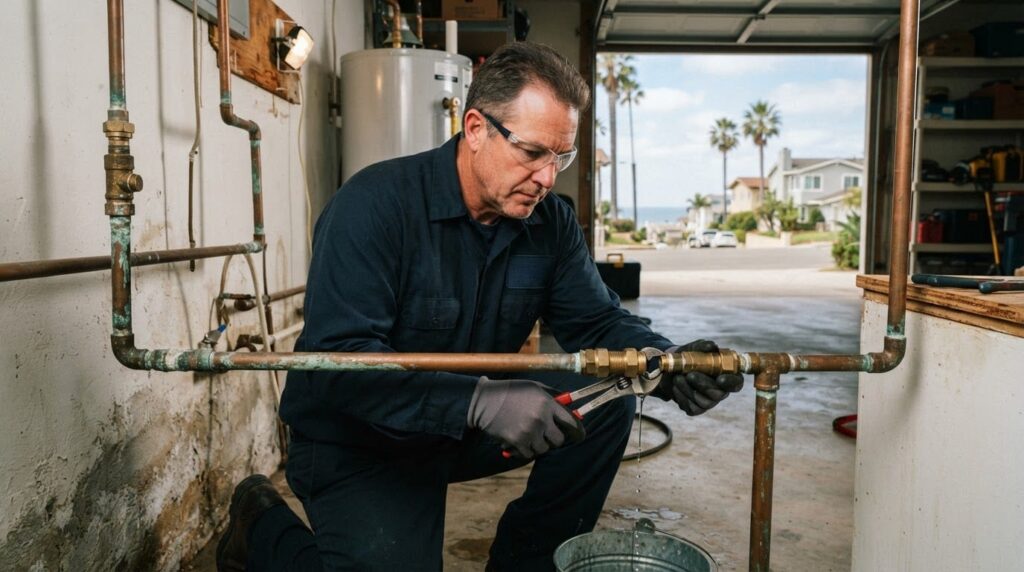
A pipe that lasts thirty years inland can show signs of wear in half that time a few miles from the surf. In Huntington Beach, the marine layer, persistent humidity, and salt-laden air work on plumbing constantly, often out of sight. Many homeowners only learn how much the environment matters when a valve seizes or a water heater connection starts to weep.
Problems that look routine in other cities can take a different course here. A homeowner who calls a Huntington Beach plumber usually has more than a single failed part to solve. The real question is often how the coastal setting, the age of the house, and the way the plumbing was installed interact to cause the failure in the first place.
Preventive attention pays off most in the places people rarely look. Local homeowners benefit from knowing where the main shutoff sits, how their water heater is anchored, and which fittings are exposed to the weather. Plumbing By Tony works with homes across the area, and the guidance below reflects the patterns that tend to show up in those inspections. The aim is to help owners tell routine maintenance from warning signs that call for a closer look.
Why Salt Air and Humidity Change How Plumbing Wears Down
Salt aerosols carried by onshore winds settle on metal surfaces and act as an electrolyte. Once moisture is present, the chloride content accelerates galvanic and pitting corrosion, particularly on brass and copper alloys, zinc-plated fittings, and steel hardware. The effect is most visible on exposed components: outdoor hose bibs, angle stops and shutoff valves in garages, water heater flex connectors, and the threaded nipples where dielectric unions meet the tank.
Corrosion on a shutoff valve matters more than it seems. A stem that has corroded to the point of seizing may not close fully during an emergency, and forcing it can break the valve body. Homeowners should periodically cycle main and fixture valves to confirm they move freely. Note that many older quarter-turn and gate valves were not designed to be exercised regularly, so the gentlest approach is a slow test with a bucket nearby.
Humidity creates a second problem indoors. Crawl spaces, attached garages, and utility closets rarely dry out fully between seasons. Moisture collects on cold-water lines, condensation forms on uninsulated supply pipes, and wood framing around supports can soften over time. Pipe straps and hangers that were once snug can loosen, leaving horizontal runs unsupported and stressing solder joints or press fittings. Inspectors often find that the first sign of trouble is a sagging line rather than a visible drip.
Homeowners in coastal neighborhoods should inspect certain components more often than inland owners typically need to:
- Exposed shutoff valves and hose bibs, at least twice a year
- Water heater connections, flex lines, and the temperature and pressure relief discharge line
- Supply lines and drain traps in garages and crawl spaces
- Escutcheons, sill plates, and anchor points where plumbing penetrates exterior walls
Water heaters deserve special attention. California requires seismic strapping on most tank heaters, and the straps and anchor bolts should be checked for corrosion. The pressure relief valve should be tested gently by lifting the lever, which should release water briefly and then reseat without dripping.
Spotting Hidden Leaks Before They Turn Into Structural Damage
Leaks rarely announce themselves in a dramatic way. More often, they appear as small changes in household routine. Watch for these early warning signs:
- A water bill that rises without a change in usage
- Noticeable drops in water pressure at multiple fixtures
- Warm spots on tile or hardwood, which can indicate a hot-water line beneath the floor
- A musty smell in a closet, under a sink, or near the slab
- Soft, bowed, or discolored drywall, especially at the base of walls
- Peeling paint or efflorescence on a wall that backs onto a plumbing run
Each sign has a benign explanation in some cases, so the goal is to track changes over time. A rising bill is worth comparing against the same billing period in the previous year, adjusted for occupancy.
Why Leaks Behind Walls and Under Floors Are Hard to Pinpoint
Water follows gravity and the path of least resistance, which means a pinhole leak can travel along a joist, wick into insulation, or pool beneath a slab long before it shows on a surface. By the time staining appears, the source may be several feet away from the damage. Visual inspection alone rarely confirms the location.
A diagnostic process usually moves from least to most invasive. Technicians typically begin with a pressure or flow test to confirm that a leak exists and whether it is on the hot, cold, or drain side of the system. Pressure decay tests isolate sections of supply line, and a meter read on the main can help determine whether water is still moving when all fixtures are closed.
Once a leak is confirmed, the common non-invasive tools include:
- Electronic acoustic listening devices, which amplify the sound of escaping water through slab and wall materials
- Thermal imaging cameras, which detect temperature differences on surfaces above hot-water runs
- Tracer gas testing, which introduces a gas such as nitrogen or a helium mix into the line and detects its escape at the surface
- Video pipe inspection, using a push camera with a sonde to inspect drain and sewer lines
Exploratory demolition is the next step when non-invasive methods cannot isolate the leak. A technician opens a small access panel, cuts a precise section of drywall, or breaks a limited area of flooring. This approach is more disruptive, but it confirms the problem directly and allows an immediate repair.
How the Method Choice Affects Cost and Resolution
Non-invasive testing typically costs between $150 and $400, depending on the complexity of the search and whether a camera inspection is included. It minimizes damage and often identifies the location within a few hours. Its limitation is that results depend on the quality of the signal and the material the water has traveled through.
Exploratory demolition adds cost and disruption. Patching drywall or flooring can add several hundred to several thousand dollars, and homes built before 1978 may contain lead-based paint, which requires work practices that comply with the EPA Renovation, Repair and Painting Rule. Licensed contractors performing this work should be RRP-certified. Repairing a slab leak, which often runs from about $1,500 to $4,000 or more, usually depends on whether the line can be rerouted above the slab instead of excavated.
The practical trade-off is time. A targeted non-invasive test followed by a focused repair often resolves a concealed leak in a single visit, while a search that begins with demolition can take several days and require more permits.
Older Homes, Older Pipes: Failure Patterns by Construction Era
Huntington Beach has a substantial stock of mid-century homes, many built during the postwar housing expansion, along with newer construction in other areas. Materials differ widely between them, and the failure patterns differ accordingly.
Galvanized steel supply lines were common in homes built through the 1950s and early 1960s. Over time, zinc coatings wear away, and the exposed steel corrodes from the inside out. Typical symptoms include reduced flow, rust-colored water, and scale buildup that narrows the bore. Galvanized pipe often fails at threaded joints, where corrosion weakens the metal and leaks begin at fittings.
Cast iron drain, waste, and vent lines, found in many homes from the same period, age differently. Their primary risks are internal rust, joint separation at hub connections, and cracks caused by ground movement. Cast iron that is still sound may be left in place, but partial sections often require replacement when they show persistent blockages.
Sewer laterals present the most significant risk for older properties. Clay tile and older cast iron laterals are vulnerable to root intrusion, which enters through separated joints and grows into a dense mass that traps debris. Offset joints and bellies, where the pipe sags, make the problem worse. A video inspection is the most reliable way to determine the condition of a lateral before deciding on repair.
Practical thinking about patch versus replacement helps homeowners decide what to do next:
- A repair is generally reasonable when the failure is isolated, the surrounding material is sound, and the line has a remaining service life that matches the owner’s plans.
- Replacement deserves evaluation when multiple failures occur in the same system, when corrosion has thinned the walls across several sections, or when access for repairs would require extensive demolition anyway.
- Trenchless pipe lining, often priced from about $5,000 to $15,000 depending on length and diameter, can be a middle path for sewer laterals when excavation would be costly.
Full repiping in a typical single-family home may range from several thousand to more than $15,000, depending on the number of fixtures and access. Owners should compare the cumulative cost of repeated repairs against that figure before committing.
Knowing What Counts as a Plumbing Emergency and What to Do First
Some plumbing problems demand immediate action, while others can safely wait until the next business day. Active flooding, sewage backing up into fixtures or floor drains, and a visibly failing water heater fall into the first category. Slow drips at a faucet, a running toilet, or a minor clog in a single fixture usually fall into the second.
The first steps matter. For active flooding, shut off the main water supply, then turn off power to affected appliances if water has reached outlets or electrical panels. For sewage backups, avoid using fixtures and keep children and pets away from the affected area. A failing water heater that is leaking from the tank requires shutting off the cold-water inlet and the gas or electric supply to the unit.
Knowing where the shutoffs are located before a problem occurs saves critical minutes. Homeowners should identify the main water valve, usually near the front of the house, in a garage, or in a utility closet. They should also know where the valves are for the water heater, individual fixtures, and any irrigation system.
If there is a suspected gas odor, the priority is different. Leave the home immediately without using light switches, phones, or appliances, and call the utility provider from outside. In Huntington Beach, that is typically the Southern California Gas Company emergency line. Only after the gas supply has been addressed should the homeowner call a licensed plumber for work on any related gas piping. Plumbers in California who work on gas lines must hold appropriate licensing, and the Contractors State License Board maintains records for verifying a C-36 plumbing license.
Seasonal Maintenance for Year-Round Coastal Homes and Rentals
Water use in Huntington Beach follows a seasonal pattern. Summer brings higher occupancy, outdoor irrigation, and heavier loads on water heaters and sewer lines. Vacation rentals and second homes may sit empty for weeks, which allows water to stagnate in lines and gives small leaks time to grow unnoticed.
Maintenance should follow that rhythm. Before peak summer use, check hose bibs and irrigation connections, confirm that the water heater is operating normally, and test the pressure relief valve. In quieter months, inspect crawl spaces and garages for moisture and look at supports and joints for signs of movement.
Rental properties and vacation homes require additional steps:
- Run each fixture for a few minutes when a unit is reoccupied to flush stagnant water.
- Document the condition of valves, water heaters, and visible connections with dated photographs before each tenancy.
- Schedule water heater flushing once or twice a year, depending on water hardness, to remove sediment from the tank bottom.
- Give tenants or property managers a single page showing where the main shutoff and water heater valves are located.
- Check drain performance after long vacancies, since traps can dry out and allow sewer gas to enter.
An annual checklist keeps the work manageable and gives homeowners a record to compare over time:
- Cycle main and fixture shutoff valves to confirm smooth operation
- Inspect exposed fittings and hose bibs for corrosion or weeping
- Confirm water heater strapping and check for leaks at connections
- Test the temperature and pressure relief valve
- Check crawl spaces and garages for moisture, staining, and sagging lines
- Review water bills against the previous year’s usage
- Note any fixtures with reduced pressure or slow drainage
- Schedule a video inspection of the sewer lateral if the home is more than thirty years old
Treating these checks as routine care rather than a response to crisis makes the most difference. Coastal plumbing rewards consistent attention, and the homeowners who fare best are usually the ones who notice small changes early and act on them.
