Your toilet backs up for the third time this month. The plumber shrugs and says, “Could be roots, could be a break, could be anything really. We’ll need to start digging to find out.” Your heart sinks as you picture your landscaping torn apart and your savings account drained.
What if there was a way to see exactly what’s wrong without destroying your yard? Modern technology makes this possible through advanced diagnostic tools. A Sewer Camera Inspection lets plumbers peer inside your pipes with surgical precision, identifying problems and their exact locations before any digging begins.
The process might sound complicated, but it’s actually straightforward once you understand how it works. Think of it as giving your plumber X-ray vision for underground pipes.
The Tools Behind a Sewer Camera Inspection
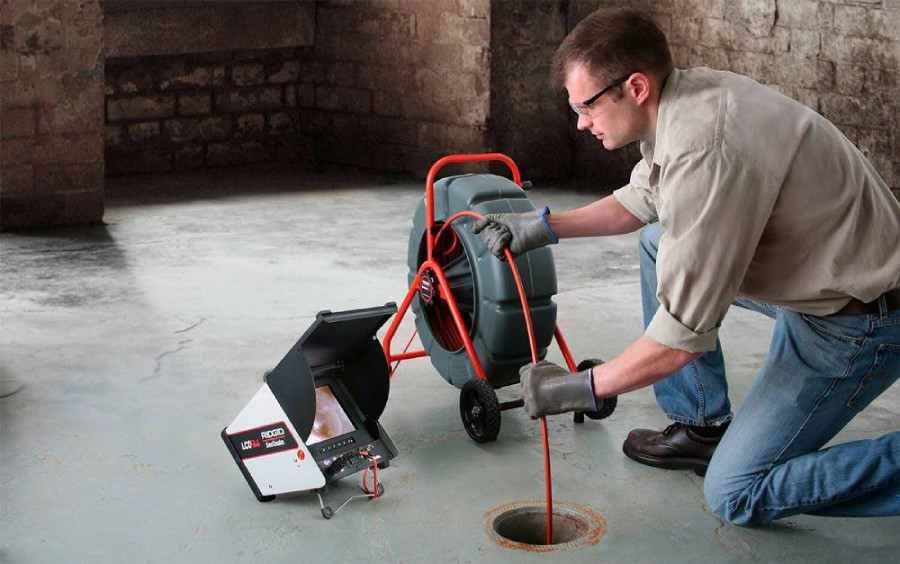
The equipment looks like something from a sci-fi movie, but the concept is simple. A waterproof camera about the size of a golf ball connects to a flexible rod that can snake through your pipes.
Step-by-Step Process of a Sewer Camera Inspection
The inspection process follows a logical sequence that most homeowners find interesting to watch.
Finding the right access point
Technicians start by locating the best entry point into your sewer system. Cleanouts are ideal because they provide straight access to main lines. These Y-shaped fittings usually sit near your foundation or in basements.
If cleanouts aren’t available or accessible, plumbers might use floor drains, toilet connections, or outdoor drain openings. The goal is finding the clearest path to the problem area.
Preparing the equipment
The camera gets calibrated before insertion. Technicians check video quality, adjust lighting, and set up recording functions. They also measure the distance from the access point to your property line or suspected problem areas.
Camera insertion and navigation
This is where the real work begins. The technician slowly feeds the camera into your pipes while watching the monitor. The flexible rod pushes the camera through your system, revealing pipe condition as it travels.
Navigation requires skill and patience. Experienced technicians know how to maneuver around obstacles and through tight turns without getting stuck or damaging pipes.
Monitoring and problem identification
As the camera moves through your system, the technician watches for signs of trouble. They pause at suspicious areas for closer examination and mark problem locations on the distance counter.
You can watch along on the monitor. Most homeowners find it fascinating to see inside their pipes for the first time. The technician explains what you’re looking at and points out any issues.
Common Issues Revealed During Inspections
Camera inspections uncover a wide range of problems that homeowners never suspected existed.
Blockages and buildup
Grease accumulation, soap scum, and debris create partial or complete blockages. The camera shows exactly what’s causing the problem and how severe it has become. You might be surprised by what people flush down toilets or wash down drains.
Hair, food particles, and toilet paper can combine into stubborn clogs that resist traditional snake treatments. Seeing the actual blockage helps plumbers choose the right removal method.
Cracked or collapsed pipes
Age, soil movement, and tree roots cause pipes to crack or collapse. Camera footage reveals the extent of damage and whether repairs or replacement are needed.
Small cracks might only require localized fixes, while collapsed sections need complete replacement. The visual evidence helps you make informed decisions about repair approaches.
Foreign objects and construction debris
You’d be amazed what ends up in sewer lines. Toys, jewelry, construction materials, and other objects can lodge in pipes and create blockages. The camera shows exactly what’s stuck and where.
What Happens After the Inspection?
The inspection is just the beginning. The real value comes from understanding what the footage means and planning appropriate responses.
Review session with detailed explanations
Professional plumbers take time to review inspection footage with homeowners. They explain what each section shows and identify any problems discovered. You get to see your pipes’ condition firsthand instead of relying on verbal descriptions.
This review process helps you understand the urgency of different issues. Some problems need immediate attention, while others can wait for convenient scheduling.
Repair recommendations and cost estimates
Based on inspection findings, plumbers recommend specific repair strategies. The visual evidence supports their recommendations and helps justify proposed work.
You receive detailed estimates for addressing each problem found. This lets you prioritize repairs based on urgency and budget constraints.
Planning maintenance schedules
Regular inspections help property owners plan maintenance budgets and avoid emergency situations. You can schedule repairs during convenient times instead of dealing with crisis situations.
Some homeowners establish annual or biannual inspection schedules to monitor pipe condition over time. This proactive approach catches problems early and extends system life.
Seeing Is Believing When It Comes to Pipe Problems
Camera inspections transform plumbing diagnostics from guesswork into precision science. You get clear answers about your system’s condition and specific guidance for addressing any problems found.
The technology removes uncertainty from underground pipe issues. Instead of wondering what might be wrong, you see exactly what needs attention and where problems are located.
Most homeowners find the inspection process educational and reassuring. Even when problems are discovered, having clear information helps you make confident decisions about repairs and maintenance.
The investment in inspection typically pays for itself by preventing unnecessary excavation and targeting repairs precisely. Your landscaping stays intact, and your repair costs stay reasonable.
If you suspect hidden pipe issues or want peace of mind about your sewer system’s condition, schedule a sewer camera inspection today. The visual evidence will guide your decisions and protect your property investment.
Frequently Asked Questions
How long does a sewer camera inspection usually take?
Most residential inspections take between 45 minutes and 90 minutes. Simple systems with straight runs finish quickly, while complex layouts with multiple branches require more time. The technician explains findings during the process, so plan to be available for the complete appointment. Commercial properties or extensive residential systems might take several hours.
Do plumbers need to dig to perform the inspection?
No digging is required for standard camera inspections. The camera enters through existing access points like cleanouts, floor drains, or toilet connections. The only excavation might involve uncovering buried cleanouts that aren’t easily accessible. This non-invasive approach preserves your landscaping and keeps costs reasonable.
Can a sewer camera inspection find leaks?
Yes, cameras can identify many types of leaks and the conditions that cause them. You might see water infiltrating from outside sources, separated pipe joints, or damaged pipe walls where leaks develop. The camera shows the location and extent of damage, helping plumbers recommend appropriate repair methods for different leak types.
Is the inspection safe for old pipes?
Modern camera systems are designed to navigate safely through pipes of various ages and materials. The flexible rods bend easily around obstacles without applying excessive pressure. Professional technicians understand how to work with fragile materials like clay or deteriorated cast iron. The inspection process is much gentler than traditional snaking or rooter services.
A-Plus Priority Plumbing – Marietta
PHONE: +16788228663